Category Archives: Cooking

Marinated Ramen Eggs

I am high-key obsessed with the jammy eggs that come in ramen. So much so, that I started making them on the regular and not even putting them in ramen. I’m just snacking on them. The simple marinade penetrates the white of the egg and infuses the whole egg with umami flavor.

Thanks to Uncle Roger for the tip on how to keep the floating egg parts submerged! You know when your eggs are properly marinated when they are brown all over and when you cut them open you can see the marinade has gotten inside the eggs.

Marinated Jammy Eggs for ramen or for snacking

Makes 4 eggs

Ingredients:

  • 4 eggs
  • 1/4 cup soy sauce
  • 1 tablespoon oyster sauce
  • 1 tablespoon rice vinegar
  • 1 tablespoon sake
  • 1 tablespoon mirin
  • 1 teaspoon Knorr chicken bouillon (optional, but this is the MSG part of the recipe)
  • 1 teaspoon sesame oil
  • 2 teaspoons miso paste

Directions:

Bring a medium pot of water to a boil. Gently lower in the eggs so they don’t crack and turn down the heat slightly so it’s not an aggressive boil. Boil for 6 minutes 45 seconds. This is my magic number to achieve not too runny and not too cooked eggs. If you like yours cooked more, boil them longer.

Drain and place eggs in an ice bath till cool. In the meantime, combine all the marinade ingredients in a mason jar and whisk well so the miso paste breaks up.

Peel the eggs and gently place them in the jar. Take a paper towel and place it on top of the eggs so it becomes saturated with the marinade. This will ensure that any parts of the egg that are floating will get marinated.

Place in the fridge overnight. Enjoy your eggs the next day or the day after. I don’t usually let them sit longer than two days (but they also don’t last that long).

Colcannon Ravioli

It’s St. Patrick’s Day and although I don’t really have much of a connection to this day, I thought it would be fun to serve something festive for dinner.

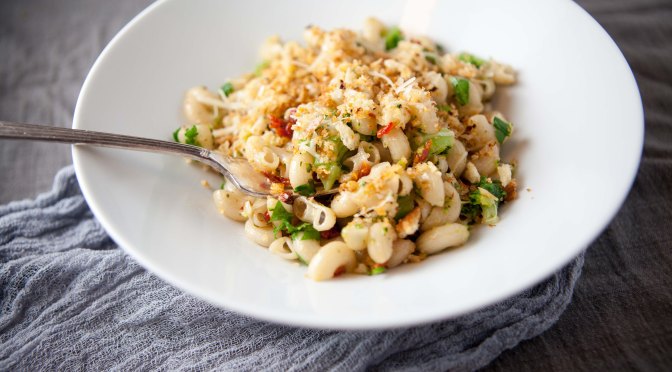
I’ve made colcannon in the past, which is a traditional Irish potato dish with cabbage, and as I was leafing through an Alice Waters cookbook I saw a recipe for potato and spinach ravioli and I thought it would be the perfect dish for St. Patrick’s Day. I didn’t follow her recipe, but made up my own and after boiling the ravioli I sautéd them like pierogis.

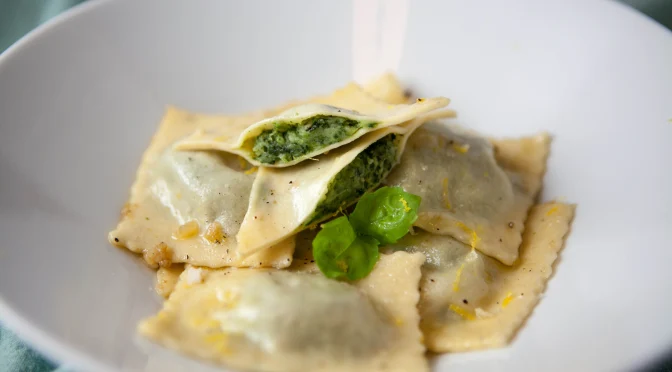
Spinach and Potato ravioli in a garlicky cream sauce

Serves 4

Ingredients

For the pasta dough:

  • 225 grams 00 flour
  • 75 grams fine semolina flour
  • 3 eggs
  • 1 teaspoon olive oil

For the filling:

  • 1 pound potatoes, any variety (I used a combination of russet, new potatoes and fingerling)
  • 8 ounces frozen spinach, thawed and squeezed dry
  • 1/3 cup grated Parmesan cheese
  • 1 tablespoon butter
  • 1/4 cup cream, divided
  • salt and pepper, to taste

For the sauce:

  • 1 tablespoon olive oil
  • 1 tablespoon butter
  • 2 cloves garlic, minced
  • 1/4 cup cream
  • salt and pepper, to taste
  • zest of 1 lemon

Special supplies:

  • Small food processor or immersion blender
  • Potato ricer (you could use a potato masher but it won’t be as smooth)
  • KitchenAid pasta roller adapter (or a hand cranked version would work too)
  • Ravioli cutter (or a pizza cutter would work)
  • Shot glass
  • Large spider strainer (a slotted spoon would work)

Directions:

1. In a large bowl or on a clean, dry countertop, combine the flours. Make a well in the center and add the eggs and olive oil. Whisk the eggs and oil till scrambled, slowly incorporating the flour. Mix into a rough ball and knead for 10 minutes. Wrap in plastic wrap and set aside for at least 30 minutes.

2. Meanwhile, peel the potatoes and cut them into roughly the same sized pieces. Boil in salted water until tender, about 10-15 minutes. Place the squeezed spinach and 2 tablespoons of cream in a food processor and run it till the spinach is puréed. You may need to add a little more cream to get it going. When the potatoes are done, drain them and press through a potato ricer into a medium mixing bowl. Add the spinach, Parmesan, butter, remaining cream and salt and pepper. This should be a relatively homogenous consistency. Add more cream if necessary to make it smooth. Place mixture in a gallon zip top bag and refrigerate until cool.

3. Time to assemble the ravioli. Tear a small handful of dough away from your pasta ball and flatten it with your hand. Set the pasta roller on the largest setting and run the dough through. It’s ok if it tears apart a little. Roughly fold the dough into thirds and run it through again on the same setting. Repeat this three or four times until your dough is smooth.

4. Adjust the roller to the next thinnest setting and run the dough through once. Repeat this step making the roller thinner each time until you’ve run it through the thinnest setting.

5. Place the sheet of dough on a clean counter top. With a ravioli or pizza cutter, cut the sheet in half, across the width, not the length.

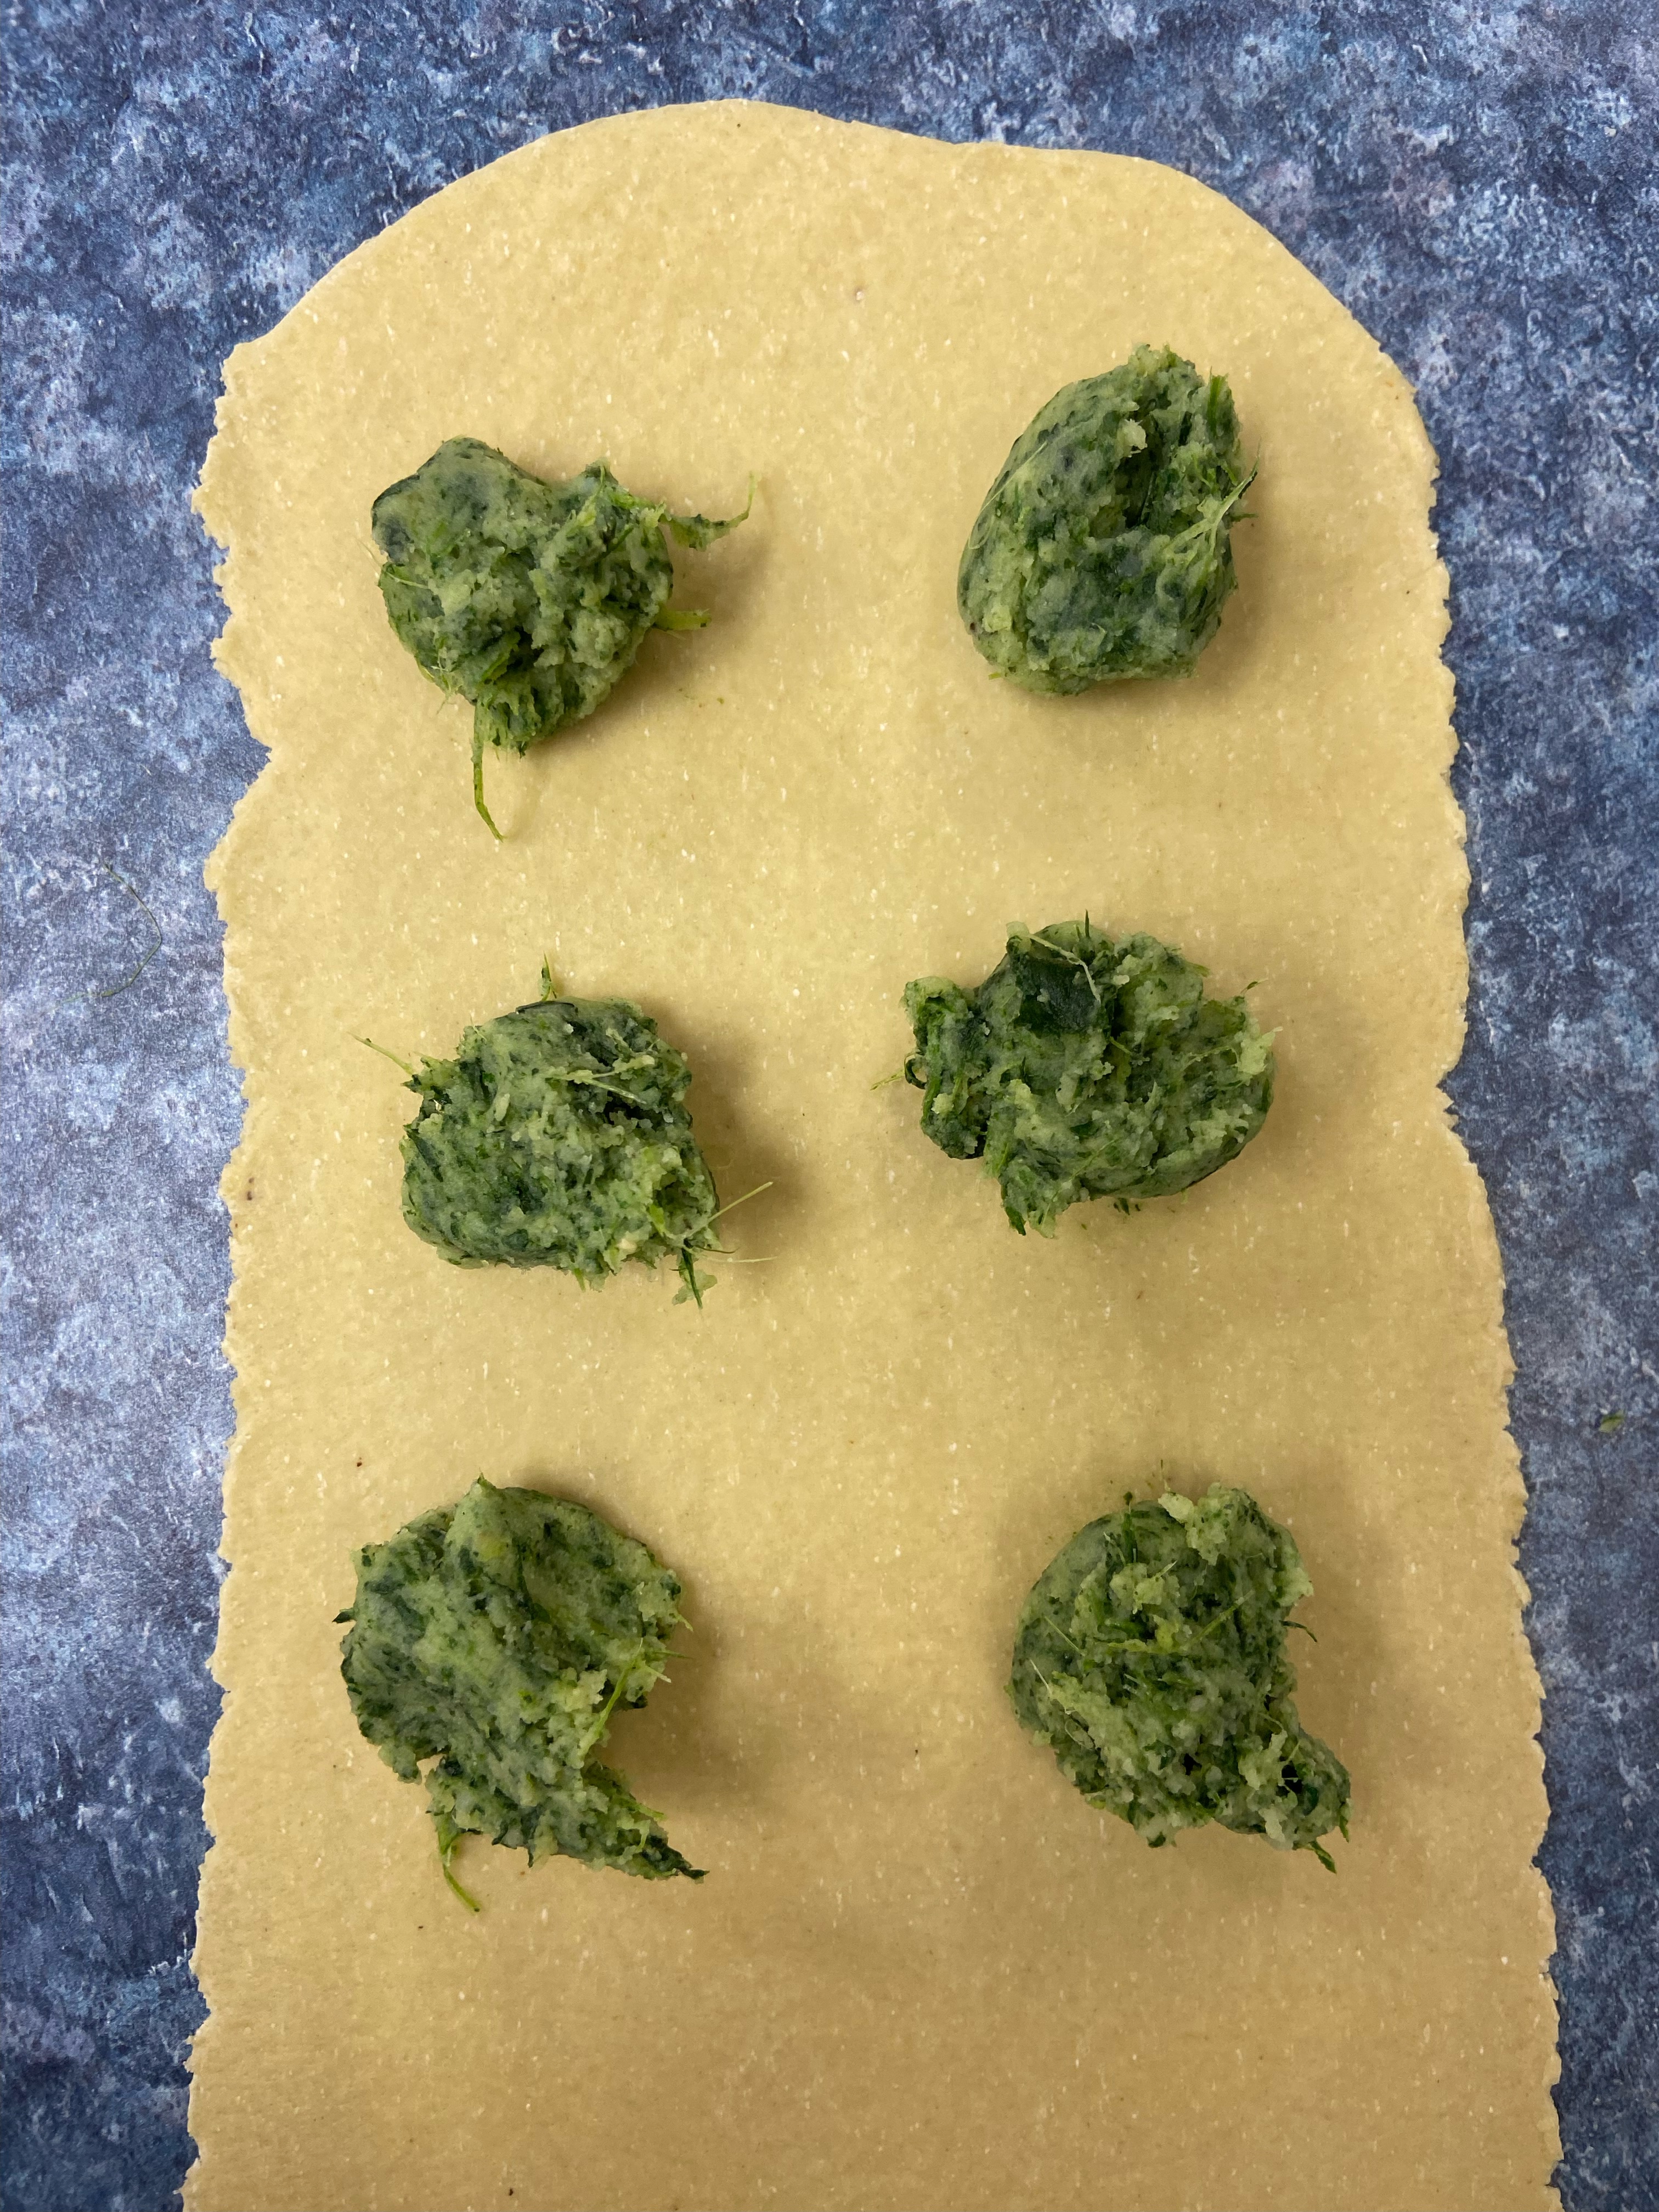
6. Cut a hole in the corner of the bag containing the filling and place about 1 teaspoon of filling on one half of the pasta sheet. Repeat so you have them evenly spaced on the dough, about 6-8 on the sheet. Place the other half of the dough on top and gently press the air out between the sheets without smashing down the filling. Use a shot glass to center the filling and lightly press down (don’t cut through the dough with the shot glass). This makes the ravioli look more uniform.

7. Use your ravioli cutter to cut out 6-8 ravioli. Pick up each ravioli and make sure the edges are sealed. Pinch any areas that look separated. Place on a semolina lined tray. Cover with foil.

8. Repeat steps 3-7 with the remaining dough and filling.

9. Bring a large pot of well-salted water to a boil. Just before the water is boiling, place a large sauté pan over medium-high heat and add the olive oil and butter. Add the garlic and cook till fragrant, turning down the heat to prevent the garlic from burning, about 1 minute. Add the cream, stir, and turn off the heat while you cook the ravioli.

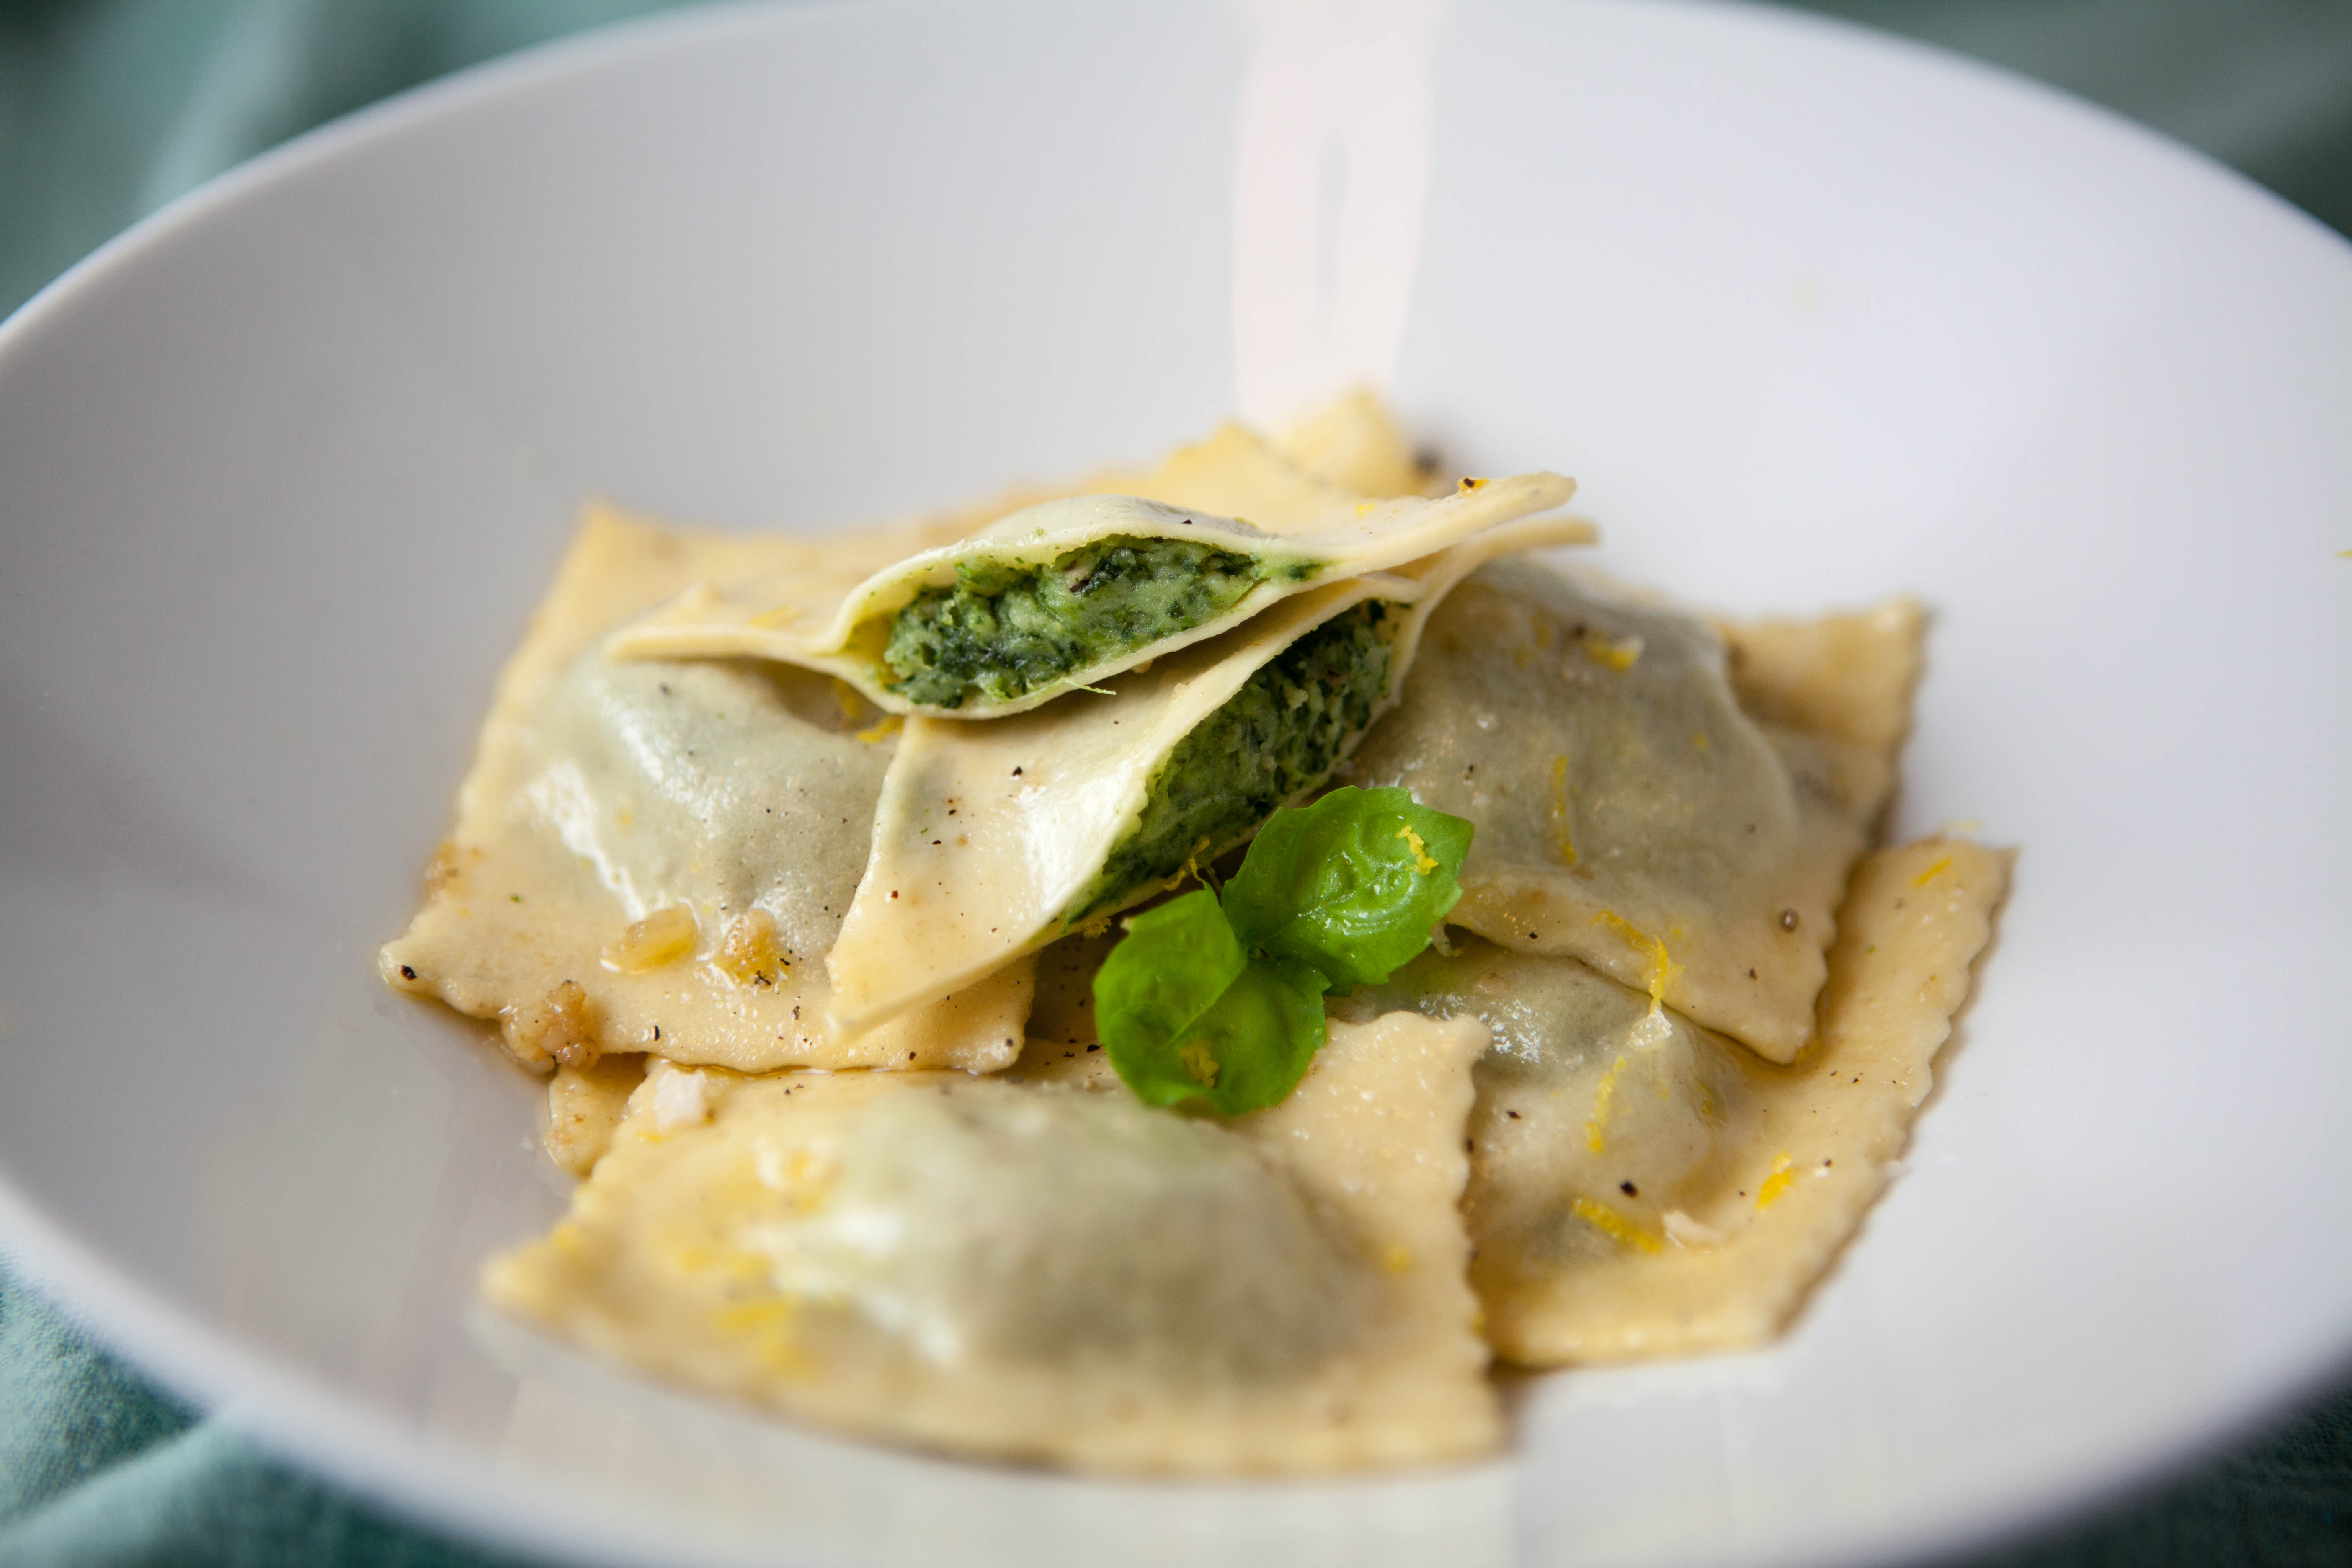
10. Add the ravioli to the boiling water, gently stirring with a spider strainer. Boil the ravioli for 3-5 minutes, until al dente. Remove one ravioli and cut off a corner to see if the dough is cooked to your liking.

11. Heat the sauté pan again over medium-low heat. Remove the ravioli from the water using the spider strainer, give it a good shake to remove excess water, and place into the sauté pan. Gently toss the ravioli till they are all coated with the sauce. Add salt, pepper and lemon zest to taste. You could either serve right away or continue cooking the ravioli until they ever so lightly brown, like pierogis.

12. Serve the ravioli with a drizzle of cream and a grind of pepper.

Quick Weeknight Pasta with Broccoli and Buttered Bread Crumbs

Sometimes I want pasta and I don’t have a lot of energy to cook. Last night I threw together a simple pasta dish with broccoli bits and buttered fresh bread crumbs. It came together in about 15 minutes and was everything I wanted. I happened to have a bag of brown rice macaroni, which ended up being really delicious. You could use any kind of small pasta shape.

Quick Weeknight Pasta with Broccoli and Buttered Bread Crumbs

Serves 2-3
Cook time: 15 minutes

Ingredients:

  • 1-2 slices good quality white sandwich bread (to make about 1/2 cup of bread crumbs)
  • 5 ounces small pasta (about 1 1/4 cup)
  • 3 ounces fresh broccoli, chopped into small bits (about 1 cup)
  • 1 tablespoon butter
  • 1/4 teaspoon dried red pepper flakes
  • Salt and pepper to taste
  • 1 teaspoon sun dried tomato oil
  • 1 teaspoon good quality olive oil
  • 1 tablespoon sun dried tomatoes, minced
  • 1 garlic clove, minced
  • 1 tablespoon chopped parsley
  • Freshly grated parmesan cheese, for serving

Instructions:

Bring a salted pot of water to a boil. Meanwhile, tear up your bread into chunks and place in a food processor. Process until they are crumbs, but not too fine. Set aside.

When water is boiling, add your pasta and stir occasionally. Set a timer and cook until al dente. Meanwhile, heat butter in a sauté pan over medium heat. Add bread crumbs, red pepper flakes and salt and pepper to taste. Turn down heat a little and stir frequently until crumbs are golden brown. Set this mixture aside.

When there are 4 minutes left on your timer, add the broccoli bits to the pasta. When pasta is cooked to your preference, drain.

Wipe out the sauté pan with a paper towel and add the sun dried tomato and olive oils. Heat over medium and add the garlic and sun dried tomatoes. Cook for about a minute, stirring, until garlic is fragrant. Add the drained pasta and broccoli and the parsley. Stir until everything is combined. Adjust for salt.

Plate the pasta and sprinkle each serving with grated parmesan cheese and the toasted breadcrumbs. Serve immediately.

Broccoli and Cheese Bread Pudding

This Thanksgiving we were left with way too many dinner rolls. I wanted to make something savory with them so I put together a bread pudding that was perfect for dinner and even tastier the next morning for breakfast!

Broccoli and Cheese Bread Pudding
A great use of leftover dinner rolls

Serves 4-6

Ingredients:

  • 5-7 leftover dinner rolls, cut into cubes
  • 2 tablespoons butter
  • 1/2 onion, chopped finely
  • 2 garlic cloves, minced
  • 2 tablespoons fresh parsley, chopped
  • 1 small head of broccoli, stems and crown chopped into small bits
  • 1/2 cup cream
  • 2/3 cup whole milk
  • 2 eggs
  • salt and lots of pepper
  • pinch of ground nutmeg
  • 1/2 cup shredded parmesan
  • 1 cup shredded sharp cheddar

Directions:

Preheat oven to 375F. Coat a small casserole dish liberally with butter and place bread cubes in it. There should be enough bread cubes to cover the bottom of the dish. Set aside. Melt 2 tablespoons butter in a pan over medium-high heat. Add onions and sauté until soft, about 5 minutes. Turn down heat, add garlic and cook until fragrant, about 1 minute.

Meanwhile, boil a small pot of salted water and add the broccoli; cook for 3 minutes and drain well. Add the broccoli to the onion mixture and combine well. Spread this mixture evenly on the bread cubes.

In a mixing bowl, whisk together the cream, milk, eggs, salt, pepper and nutmeg. Evenly pour this mixture over the broccoli and bread cubes.

Sprinkle on the cheeses, then lightly press down on the mixture to help the bread absorb some of the liquid.

Cover with foil and bake for 30 minutes. Remove foil and bake another 15 minutes. Remove from oven and serve. Save leftovers overnight and eat for breakfast the next day for an even tastier dish!

White Bean + Tomato Stew

I pretty much want pasta all the time. It’s my Achilles heel, so to speak. But my body probably shouldn’t have pasta all the time. So here’s a recipe I tossed together that gives off perfect pasta vibes but uses canned white beans instead. It’s not a stew, exactly, but I didn’t know what else to call it.

White Bean + Tomato Stew: a quick meal to satisfy that pasta craving

Serves 4
Cook time: 20 minutes or so

Ingredients:

  • 1 tablespoon butter
  • 1/2 onion, chopped
  • 6 ounces crimini mushrooms, roughly chopped
  • 1/2 teaspoon salt
  • 2 cloves garlic, chopped
  • 3 tablespoons white wine or sake
  • 1 teaspoon dried basil
  • 1/2 teaspoon dried oregano
  • pinch of dried red pepper flakes
  • 1 cup marinara sauce
  • 1/4 cup cream
  • 1 can white beans, drained
  • 2 handfuls fresh baby spinach, roughly chopped
  • 1/2 cup parmesan cheese
  • Salt and pepper, to taste
  • 1 tablespoon fresh parsley, chopped
  • 1/4 cup chopped pistachios

Directions:

Melt butter in a medium sauté pan over medium heat. Add the onions and mushrooms. Cook until onions are soft and mushrooms have released their liquid, about 7 minutes. Add the garlic and cook until fragrant, about 1 minute.

Deglaze the pan with the white wine and let it bubble for 1 minute. Add the dried basil, dried oregano and dried red pepper flakes. Pour in the marinara and cream, bring to a simmer and turn heat to low.

Add the beans and baby spinach; cook until spinach is wilted, just a few minutes. If stew is too thick, add in a little more cream. Stir in the parmesan cheese and add salt and pepper to taste. Sprinkle on the parsley and pistachios; serve immediately with a drizzle of good olive oil.

Banana Blueberry Muffins

I’m not really into banana bread. Enough said. So when I had a few overripe bananas on the counter the other day I decided to make up a recipe as I went and ended up with a delicious batch of banana blueberry muffins. They aren’t too sweet, aren’t too dense, aren’t too oily. I guess they are just right!

Banana Blueberry Muffins

Makes 12 muffins

Ingredients:

  • 3 ripe bananas
  • 2 eggs
  • 1/3 cup white sugar
  • 1/3 cup brown sugar
  • 1 teaspoon vanilla
  • 1/3 cup melted coconut oil
  • 1 1/2 cups all-purpose flour
  • 1 teaspoon baking powder
  • 1/2 teaspoon baking soda
  • 1/2 teaspoon salt
  • 1 cup fresh blueberries

Preheat oven to 375F. In a mixing bowl, mash the bananas with a potato masher till they are a pulp. Add the eggs, sugars and vanilla and combine with an electric mixer. Mix in the coconut oil.

In a separate bowl, combine the flour, baking powder, baking soda and salt. Add this all to the banana mixture and mix till just combined. Fold in the blueberries.

Line a muffin tin with cupcake liners. Spoon in equal amounts of batter into each cupcake liner. Bake for 22-25 minutes, rotating the pan halfway, until the tops are golden brown and a toothpick inserted in the middle of a muffin comes out clean. Remove from oven and let cool for a few minutes. Carefully transfer muffins to a cooling rack and let sit till room temperature or until you can’t stand it anymore and have to eat a piping hot one and burn your tongue on a molten blueberry.

Authentic Enchiladas Verdes

When we visit my parents’ place in Mexico the best part of our trip is always the food Moña, their housekeeper, prepares. She used to run a restaurant out of her house and she makes some classic Mexican dishes such as chilaquiles and chilies rellenos. Last time we visited she prepared enchiladas verdes. The tomatillo-based sauce was delicate and the cheese-filled enchiladas were absolutely delicious. I’ve been daydreaming of this dish ever since.

My folks are down there now so I asked my dad if he could get Moña to tell him the recipe. Instead, he made a video of her preparing them.

Moña doesn’t measure anything and we don’t have all the exact same ingredients here. It was a fun challenge to translate/transpose her method. I’ll definitely be making these again.

Green Enchiladas

Serves 4

Sauce:

  • 1/2 of an onion, divided
  • 1/2 of a fresh jalapeño, seeded
  • 3 garlic cloves, divided
  • 1 1/2 pounds tomatillos (about 15-20), husks removed
  • 1 packed cup fresh cilantro
  • 1 cup Mexican-style cream, divided
  • 1 tablespoon olive oil
  • 1/4 cup reserved tomatillo liquid (see recipe instructions)
  • 2-4 teaspoons granulated chicken bouillon

Filling:

  • 1/3 cup finely chopped onion
  • 2 teaspoons olive oil
  • 7 ounces crumbled queso fresco (about 1 1/2 cups), 8 ounces grated Manchego or Monterey jack (about 2 cups, divided)

Enchiladas:

  • 12 corn tortillas
  • Vegetable oil, for frying

Directions:

Preheat oven to 350F.

Place 1/4 of an onion, 1 garlic clove, jalapeño and tomatillos in a saucepan and add enough water to submerge everything. Bring to a boil, turn down heat and simmer for 10 minutes.

Using a slotted spoon, add the onion, garlic, jalapeño and tomatillos to a blender. Strain the tomatillo water through a mesh sieve into a liquid measuring cup. Place any pulp from the sieve into the blender and pulse blender until smooth. Add cilantro and blend. Add 3/4 cup cream and blend.

Finely chop the 2 remaining cloves of garlic and 1/4 of an onion. Wipe dry the saucepan and add 1 tablespoon olive oil. Heat oil and sauté garlic and onion till soft, about 2 minutes. Add the contents of the blender to the saucepan. Place 1/4 cup of tomatillo water in the blender and swish it around to loosen up any leftover sauce; add to the saucepan. Add 2 teaspoons of chicken bouillon and taste for saltiness. If it needs more salt, add more bouillon. Turn heat down and gently simmer for 10 minutes so sauce thickens, stirring occasionally. Turn off the heat and add remaining 1/4 cup of cream; set sauce aside while you prepare the filling.

Sauté the 1/3 cup chopped onion in olive oil until soft, about 2 minutes. Let cool slightly and combine with the queso fresco and 1 cup of the Manchego or Monterey jack. Set aside the filling while you prepare the tortillas.

In a frying pan, add enough vegetable oil to liberally coat the pan, about 1/3 cup. Heat oil over high. Add the edge of a tortilla to see if the oil is ready. The tortilla should bubble a little in the oil. When oil is hot enough, add one tortilla and fry just a few seconds on each side, flipping three or four times. You don’t want the tortillas to become crispy, but the oil makes them more pliable. Lift tortilla out of pan and let the excess oil drip off the tortilla. Transfer tortilla to a platter or tray and repeat with remaining tortillas, adding more oil if needed.

Here’s the technique Moña taught me for how to flip the tortillas in the hot oil.

To assemble the enchiladas, spoon about 1 cup of the sauce into the bottom of a casserole dish. Pat a tortilla with a paper towel to absorb any excess oil, then dip the tortilla into the pot of sauce, letting any excess drip back into the pot. Place tortilla on a prep tray, add a small handful of filling, and roll up the tortilla, placing it seam-side down in the casserole dish. Repeat with remaining tortillas and filling. You could also add shredded cooked chicken in this step, if you like.

When the dish is packed with enchiladas cover them with a layer of sauce, using a spoon to spread the sauce into every nook and cranny. Top with remaining Manchego or Monterey jack. Cover with foil and bake for 15-25 minutes, until cheese on top is fully melted.

Tomato Farrotto with Spinach and Ricotta

I love pasta. Whenever my bestie Kelly comes over for dinner we usually make a pasta dish. In an effort to try and eat more healthily I decided last time she came over to cook something with equal flavor to my usual pasta craving but with a healthier grain: farro.

I put together a farrotto dish, which is made just like risotto but with the ancient grain farro, which is high in fiber, protein, vitamins, minerals and antioxidants.

Much like risotto, this recipe requires a lot of stirring, but with a best friend by your side and a couple of glasses of wine, the time goes by quickly.

I splurged for high-quality ricotta to dollop on top and sprinkled it with fresh chopped basil for that extra-special touch.

Tomato Farrotto with Spinach and Ricotta

Serves 3-4

Ingredients:

  • 2.5-4 cups chicken stock
  • 1.5 cups crushed tomatoes
  • 2 tablespoons butter
  • 1 cup minced onion
  • 3 cloves garlic, minced
  • 1/4 cup minced marinated tomatoes (or 2 tablespoons tomato paste)
  • 1 teaspoon Trader Joes umami seasoning (optional)
  • 2 teaspoons dried basil
  • 1 teaspoon dried oregano
  • salt and pepper to taste
  • splash of white wine
  • 1 1/4 cups uncooked farro
  • 2 cups chopped baby spinach
  • 1 generous cup of grated parmesan
  • 2 tablespoons half and half or cream
  • fresh ricotta, to serve
  • chopped fresh basil, to serve

Directions:

In a small saucepan, combine 2.5 cups stock and the crushed tomatoes. Cook till simmering and keep on low flame. Meanwhile, heat a large pan over medium high with the butter. Sauté the onions until soft, about 5 minutes. Add the garlic and the marinated tomatoes and cook until garlic is fragrant, about 1 minute. Deglaze with the splash of white wine.

Add the dried farro, umami seasoning, dried basil and oregano and cook until farro is lightly toasted, just a couple of minutes. Season with salt and pepper (I recommend skipping the salt if you used the umami seasoning).

Add a couple of ladlefuls of the hot stock/tomatoes to the pan and stir. Turn down the heat till the pan is at a low simmer. When much of the liquid has been absorbed into the farro, add another couple of ladles of the stock/tomatoes. Continue this until the farro is al dente, about 45 minutes, stirring often. You will need to heat up more stock after you’ve run out of the stock/tomato mixture. I can’t say exactly how much you’ll need. It just depends how much liquid the farro absorbs.

When farro is cooked through, add the chopped spinach and cook until spinach is wilted, a couple of minutes. Turn off heat and add the parmesan and half and half.

Serve with dollops of ricotta and chopped fresh basil.

Miso Ramen

As autumn descends into what I call “waiting for winter” I crave cozy, warming meals. I’ve been trying out making my own ramen and I think I finally have it down.

As with most of my recipes, this is a flexible dish where you can interchange a lot of ingredients. Baby bok choy or baby spinach, ramen noodles or udon noodles, raw chicken or leftover rotisserie – do what you like, but what’s key is a good broth or stock. I recommend homemade bone stock, but if that’s out of your wheelhouse, Costco carries a “sipping bone broth” that’s remarkably rich and delicious.

Miso Ramen – a simple recipe

Serves 4

Ingredients:

  • 7 cups chicken stock
  • 3 scallions, 1 reserved for serving
  • 2-inch piece of ginger, unpeeled and sliced
  • 1 1/2 pounds boneless, skinless chicken thighs (or leftover rotisserie chicken)
  • 3 garlic cloves, smashed
  • 3 dried shiitake mushrooms
  • 1, 5-inch piece of kombu
  • 1 tablespoon black soy sauce
  • 1 tablespoon sake (optional)
  • 4 ounces sliced crimini mushrooms
  • Pinch of white pepper
  • Black pepper, to taste
  • 1/2 cup sweet white or yellow miso
  • 1 1/2 cups fresh or frozen corn (optional)
  • 4 eggs
  • 4 ounces chopped baby spinach
  • 1 1/2 pounds ramen or udon noodles
  • 1 brick firm tofu, drained and cubed
  • chili oil, for serving
  • furikake, for serving

IMG_2403

Directions:

In a medium pot, combine the stock, 2 whole scallions, ginger, chicken, garlic, shiitake, kombu, black soy sauce, sake, crimini mushrooms, white pepper and black pepper. Cover, bring to a boil, turn down heat and simmer for 20 minutes.

Remove the scallions, ginger, chicken, shiitake and kombu. Slice the shiitake mushrooms and reserve for serving. Shred the chicken and place it back in the pot. Discard the ginger, scallions and kombu. Add the miso and corn to the pot and continue to simmer while you prepare the eggs.

Bring a medium pot of water to boil and gently place four eggs into the water. Let boil for 6 minutes and 30 seconds. Using a slotted spoon, remove the eggs and run under cold water. Peel and set aside. Chop the remaining scallion and set aside. Add the spinach to the broth and continue simmering while the noodles cook.

Bring the water back to a boil and add the noodles. Boil them according to the package directions. Drain the noodles and rinse with cold water to keep them from overcooking.

Divide the cubed tofu and noodles into four ramen bowls. Fill each bowl with broth, being sure to get some good chicken and crimini bits into each bowl. Carefully cut each egg in half and place two halves in each bowl. Divide the sliced shiitake mushrooms into each bowl. Sprinkle each bowl with the chopped scallion and furikake. Top with chili oil to taste. Serve immediately.

IMG_2402


Creamy Broccoli Cheddar Soup

I cleaned out my freezer today and found some broccoli florets lurking in the back. I love broccoli, but only when I steam it from fresh. When it’s already frozen it can be sort of mushy. It’s perfect for soup! Or if you have leftover broccoli in the fridge, you can use that with some fresh baby spinach.

Here’s a delicious recipe I came up with today. The bacon gives the soup a smokey flavor that accentuates the broccoli and sharp cheddar perfectly. Add in potatoes and canned white beans and you give the soup a little more bulk. Serve this with a crusty white bread and you’ve got yourself a delicious wintertime supper!

Creamy Broccoli Cheddar Soup with Bacon, Potatoes and White Beans

Creamy Broccoli Cheddar Soup with Bacon, Potatoes and White Beans

Serves 6, probably

Ingredients:

  • 1 pound broccoli (this doesn’t have to be exact)
  • 2 strips of bacon, chopped
  • 1 cup chopped onion
  • 5 garlic cloves, smashed and choppped
  • 3 tablespoons butter
  • 3 tablespoons flour
  • 1/2 cup white wine
  • 3 cups chicken stock
  • Freshly ground pepper, to taste
  • 1/2 teaspoon dried thyme
  • 2 medium russet potatoes, peeled and cut into small cubes
  • 1 can of white beans, drained and rinsed
  • 6 oz. sharp cheddar, grated
  • 1 oz. pecorino Romano cheese, grated
  • 3/4 cup cream

Directions:

If using fresh broccoli, steam it until tender. If using frozen broccoli, thaw it under hot water. Roughly chop and set broccoli aside.

Add bacon to a dutch oven and heat over medium till bacon is cooked through but not crispy. Add onions and cook till translucent, about 3-5 minutes. Add garlic and cook till fragrant, about 30 seconds. Add the butter until melted and mix in the flour till a paste forms. Cook this for about 1-2 minutes. Add the white wine and scrape up any browned bits. This will thicken very quickly. Slowly stir in the chicken stock. Add pepper, thyme and broccoli and bring to a simmer. Turn heat to low, cover and simmer for 15 minutes.

Remove pot from heat and use an immersion blender to blend the soup until it’s a consistency you like. This is up to you. I like a chunky soup so I didn’t blend it very long, but if you prefer a smoother soup, go to town with your immersion blender.

Return pot to low flame and add in the potatoes and beans. Simmer until potatoes are tender, about 15 minutes.

Turn off the heat and stir in the cheeses till melted. Stir in the cream. Add salt if desired. Serve immediately.